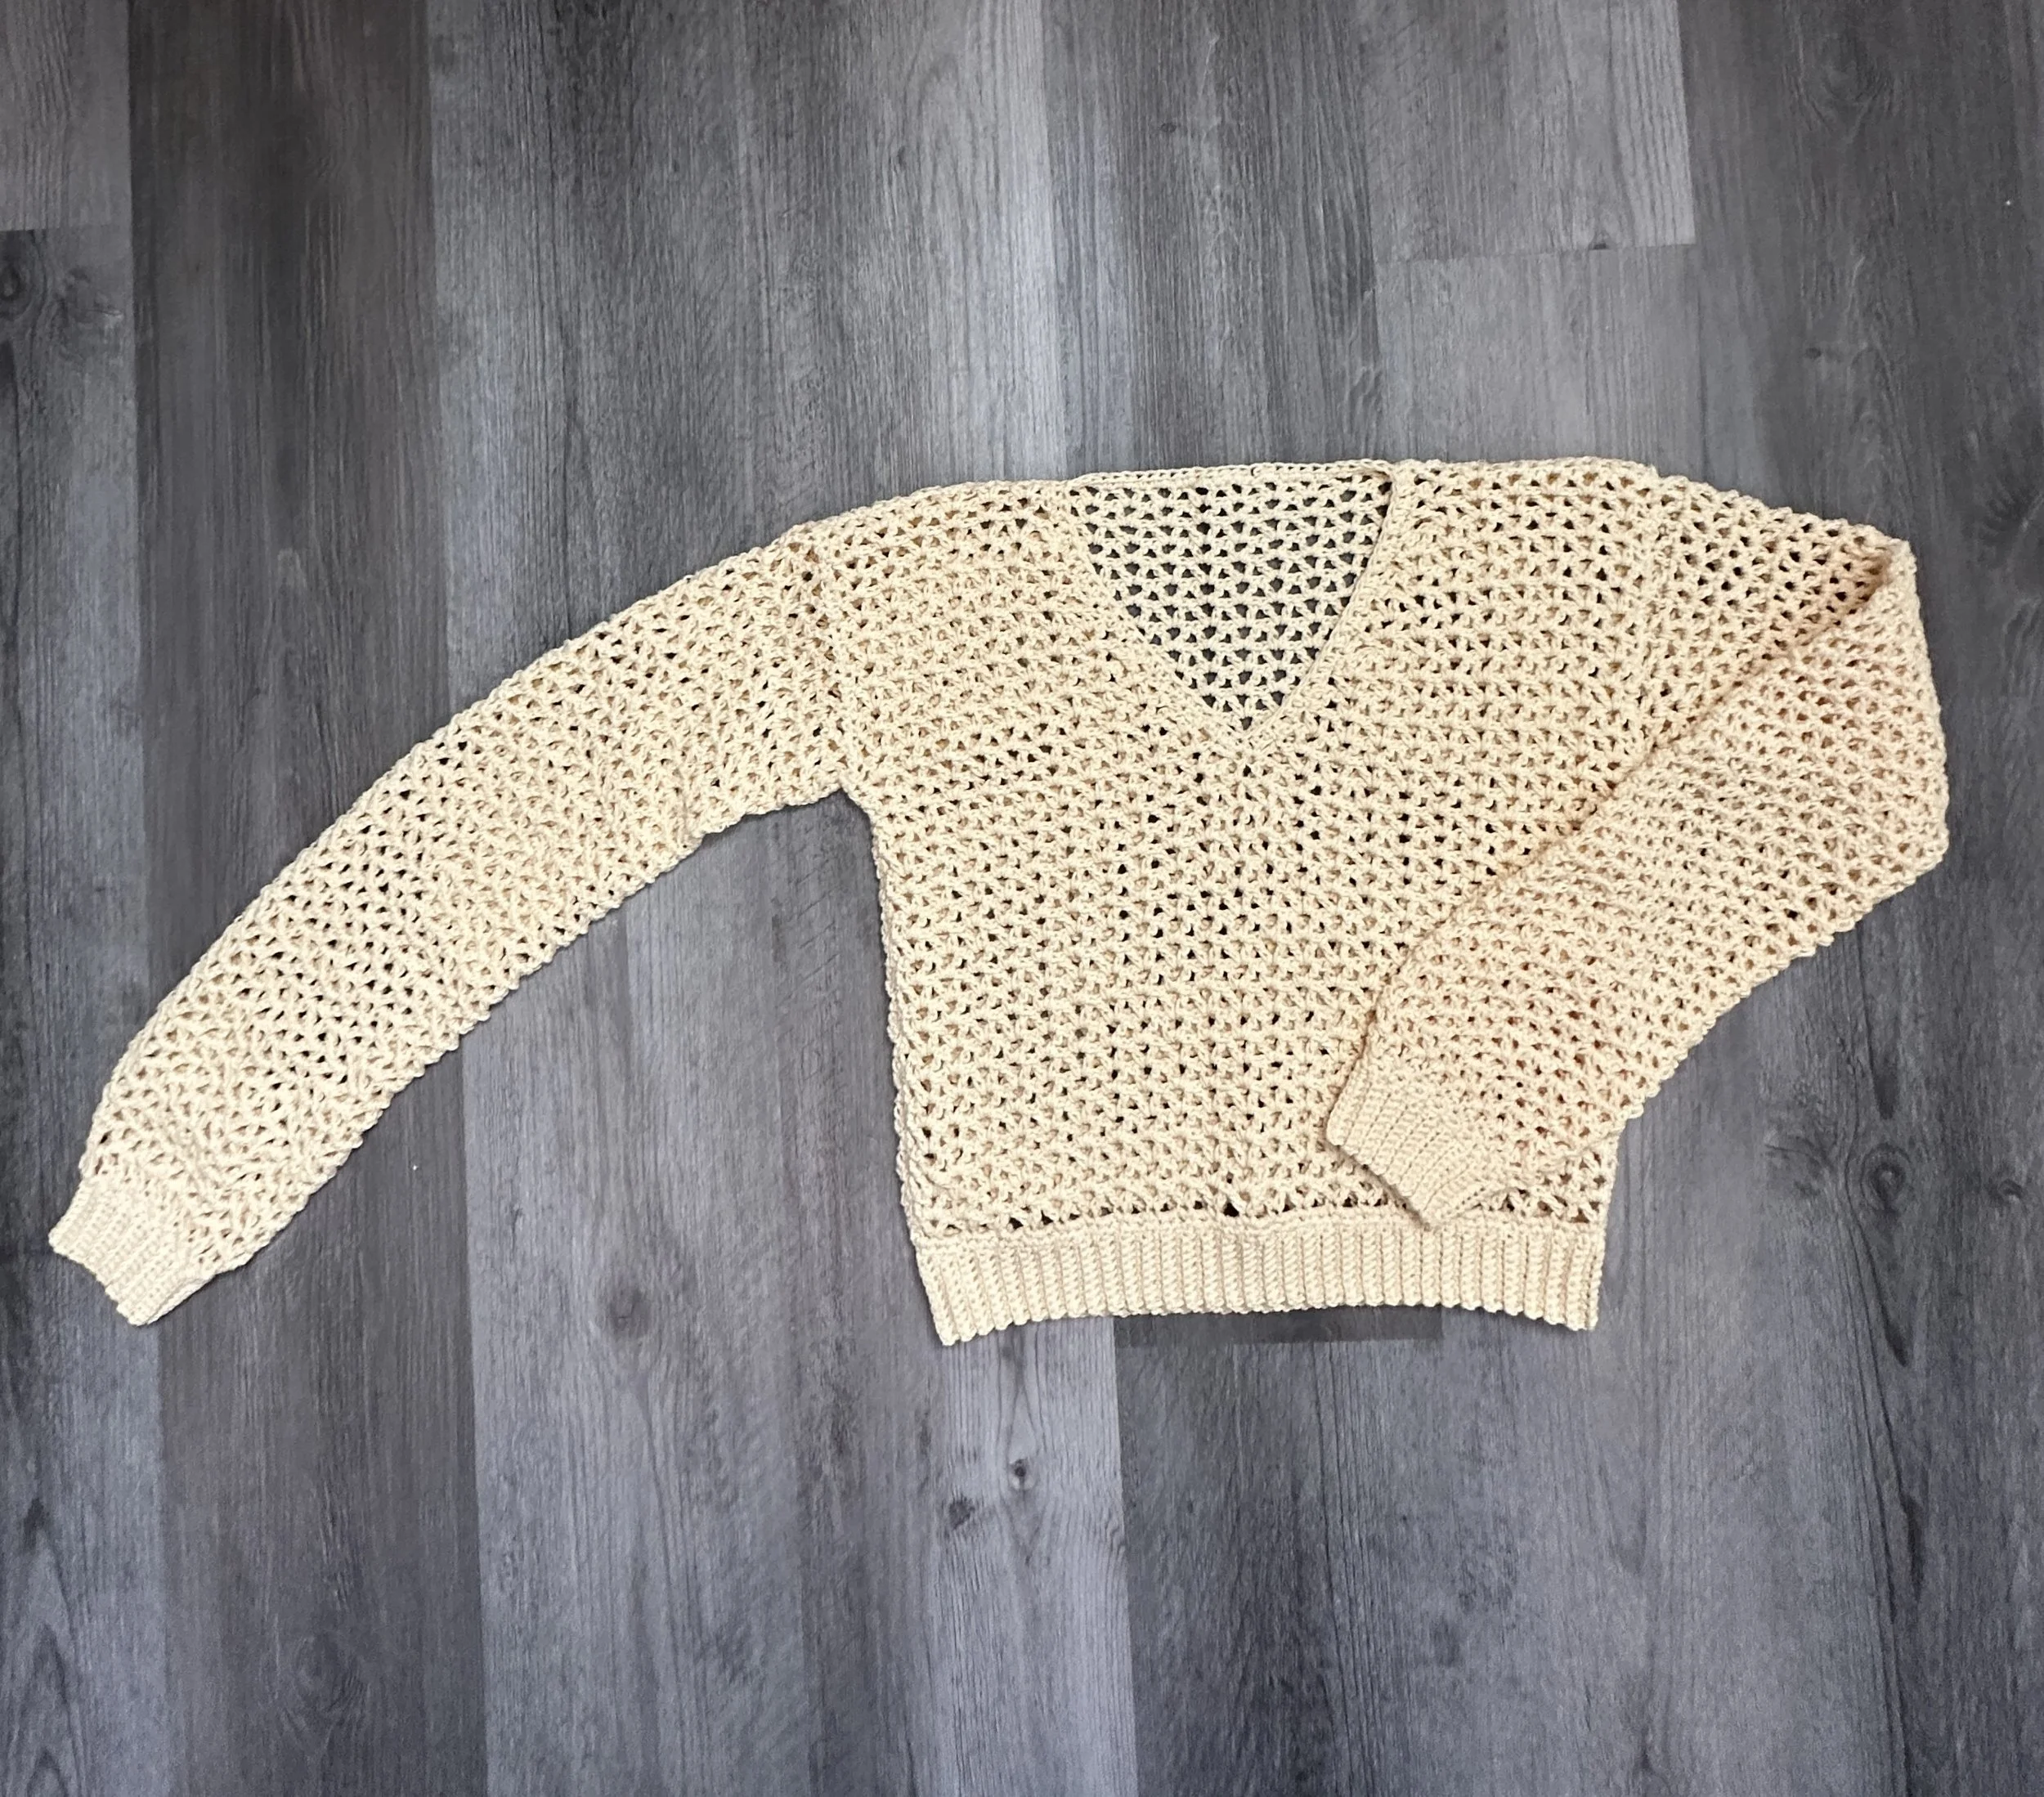
Crochet V-Neck Pullover
This v-neck pullover pairs a classic silhouette with a simple stitch pattern to create the perfect summer sweater. The front and back panels are worked from the bottom up and the sleeves worked from shoulder to wrist.
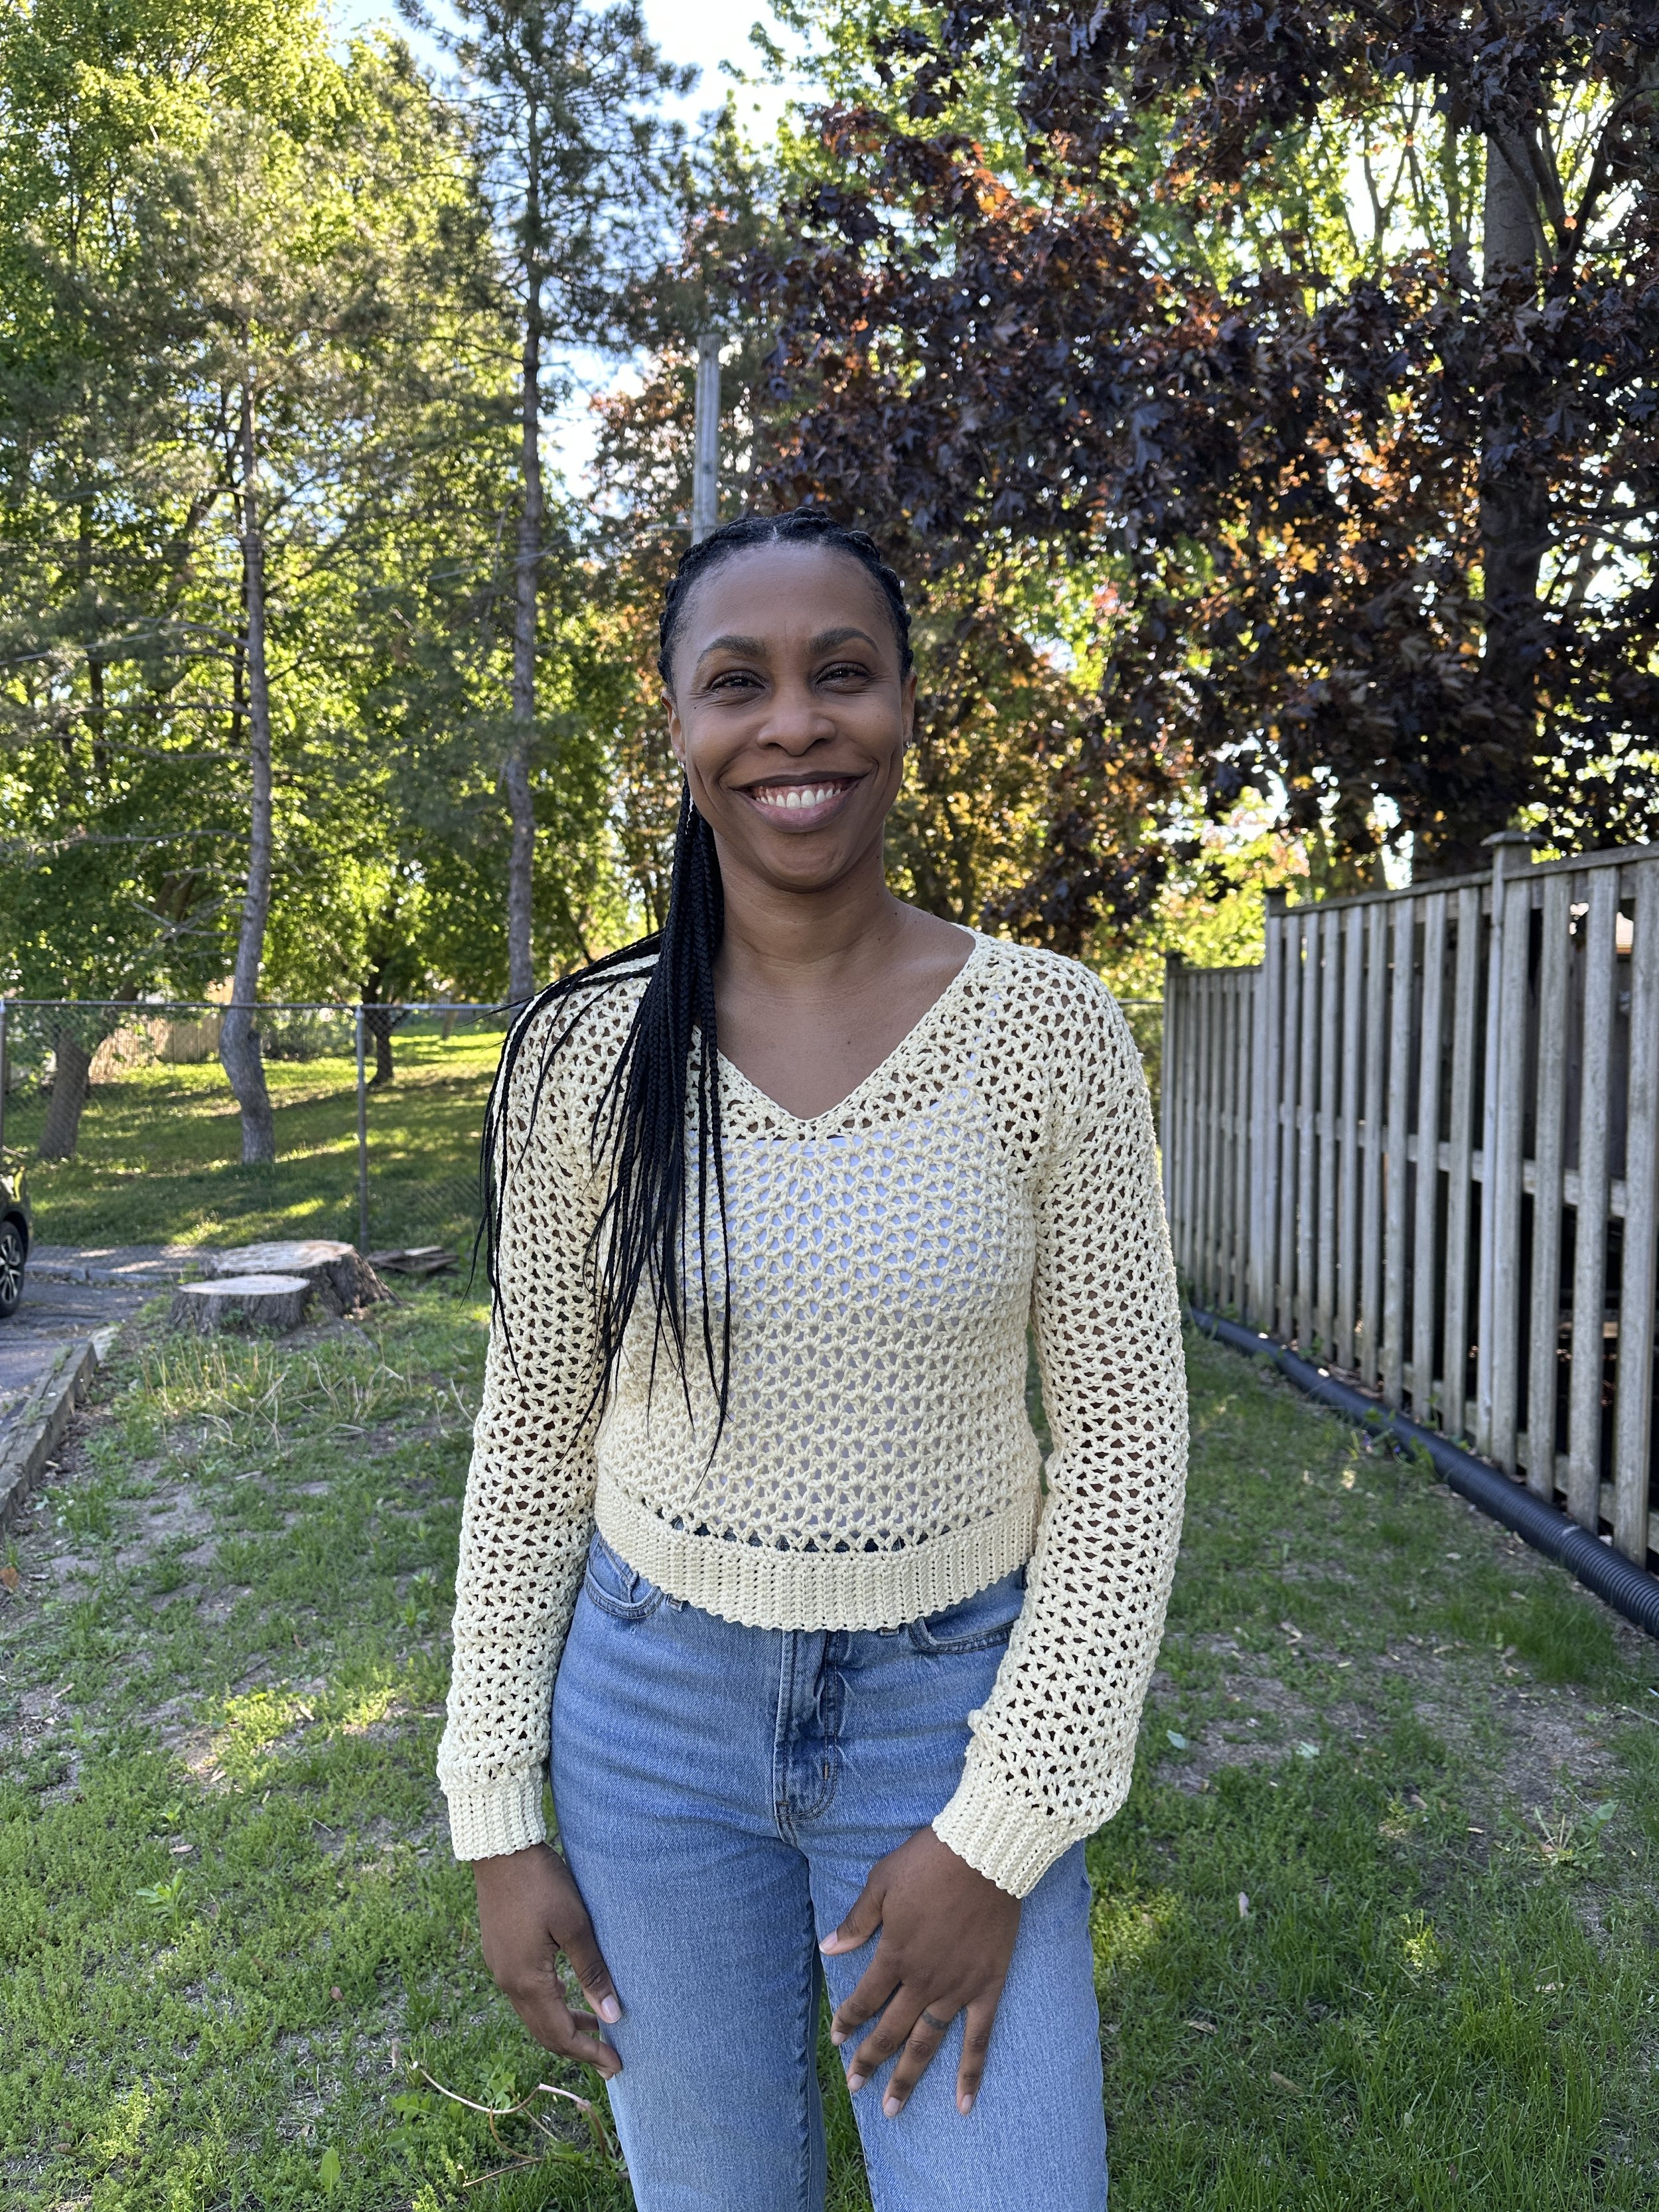
This is a recipe style pattern that allows you to customize the fit to your liking. To make this piece you only need knowledge of some basic crochet stitches. We will be using the v-stitch, which is made up of double crochet stitches and chains to construct the main sections. We will be using single crochet and slip stitches for the ribbing and finishing the neck opening with a round of half double crochet.
Materials
Yarn: Drops Cotton Light (#3 DK), 50g/1.76oz, 115yds/105m, 50% Cotton, 50% Polyester in Colour 42 (I used 410g/945 yds to make my sweater)
Hook: 4.5mm/7 and 3.5/E
Notions: Tape measure, tapestry needle, scissors, stitch markers
Sizes: XS (S, M, L, XL) (2XL, 3XL, 4XL, 5XL)
Finished Bust Measurements:
32 (36, 40, 44, 48) (52, 56, 60, 64) Inches
81.28 (91.44, 101.6, 111.76, 121.92) (132.08, 142.24, 152.4, 162.56) CM
Gauge: 5 V-sts x 7 rows = 4"/10cm (with larger hook)
Abbreviations
ch(s) - chain(s)
dc - double crochet
ch-sp - chain space
yo - yarn over
sk - skip
sc - single crochet
sl st - slip stitch
tch - turning chain
hdc - half double crochet
blo - back loop only
Special stitches
Stacked sc – without chaining, insert hook in first st, yo, pull up a loop, yo, pull through both loops on hook, insert hook under the left vertical leg of the sc just made, yo, pull up a loop, yo, pull through both loops on hook. Stacked sc complete.
v-st - (dc, ch 2, dc) in specified st or ch-sp
sc2tog - insert hook into next st or ch-sp, yo pull up a loop, insert hook in next st or ch-sp, yo pull up a loop, yo pull through all three loops on hook.
Pattern Notes
This is a recipe style pattern that allows you to customize the fit to your liking.
Stitch and row counts are estimates to get you started. Be sure to measure and adjust accordingly.
Your starting chain must be a multiple of 4 + 5.
To make adjustment to the width add and remover chains in multiples of 4. To adjust the length, add and remove rows as needed.
Instructions
Back panel
Foundation chain: ch a multiple of 4 until your ch is half of your desired bust measurement, then add 5 chs.
ch 85(93, 105, 113, 125) (133, 145, 153, 165)
ROW 1: v-st in the 6th ch from the hook (5 sk chs count as dc and 2 chs), sk 3 chs, v-st in next ch, rep ** to last 3 chs, sk 2 chs, dc in last ch. Turn.
20 v-sts + 2 dc (22 v-sts + 2 dc, 25 v-sts + 2 dc, 27 v-sts + 2dc, 30 v-sts + 2dc) (32 v-sts +2 dc, 35 v-sts + 2 dc, 37 v-sts + 2 dc, 40 v-sts + 2 dc)
ROW 2: Stacked sc in first st (or ch 3), v-st in next ch-2 sp, *v-st in each ch-2 sp to end of row, dc in top of tch. Turn.
ROW 3: Stacked sc in first st, *v-st in each ch-2 sp to end of row, dc in last st. Turn
ROW 4: Repeat row 3 until back panel is 2 inches shorter than your desired top length.
35(35, 35, 37, 37) (37, 39, 39, 39) rows.
Measure the width of your piece after the first 4-6 rows to ensure the width is what you would like it to be and and adjust as needed.
Front Panel
Foundation Chain: ch a multiple of 4 until your ch is half or your desired bust measurement, then add 5 chs. [The chs for the front panel must be the same as the back panel]
85(93, 105, 113, 125) (133, 145, 153, 165)
ROW 1: v-st in the 6th ch from the hook (5 sk chs count as dc and 2 chs), sk 3 chs, v-st in next ch, rep ** to last 3 chs, sk 2 chs, dc in last ch. Turn. 20 v-sts + 2 dc (22 v-sts + 2 dc, 25 v-sts + 2 dc, 27 v-sts + 2dc, 30 v-sts + 2dc) (32 v-sts +2 dc, 35 v-sts + 2 dc, 37 v-sts + 2 dc, 40 v-sts + 2 dc)
ROW 2: Stacked sc in first st (or ch 3), v-st in next ch-2 sp, *v-st in each ch-2 sp to end of row, dc in top of tch. Turn.
ROW 3: stacked sc in first st, *v-st in each ch-2 sp to end of row, dc in last st. Turn.
ROW 4: Repeat row 3 until panel reaches the base of the neck opening.
19(19, 19, 21, 21) (21, 23, 23, 23)
Neckline Shaping: You will now decrease evenly over your remaining rows. Place a stitch marker in the centre of your front panel as you will now start to work on one side of the neck opening.
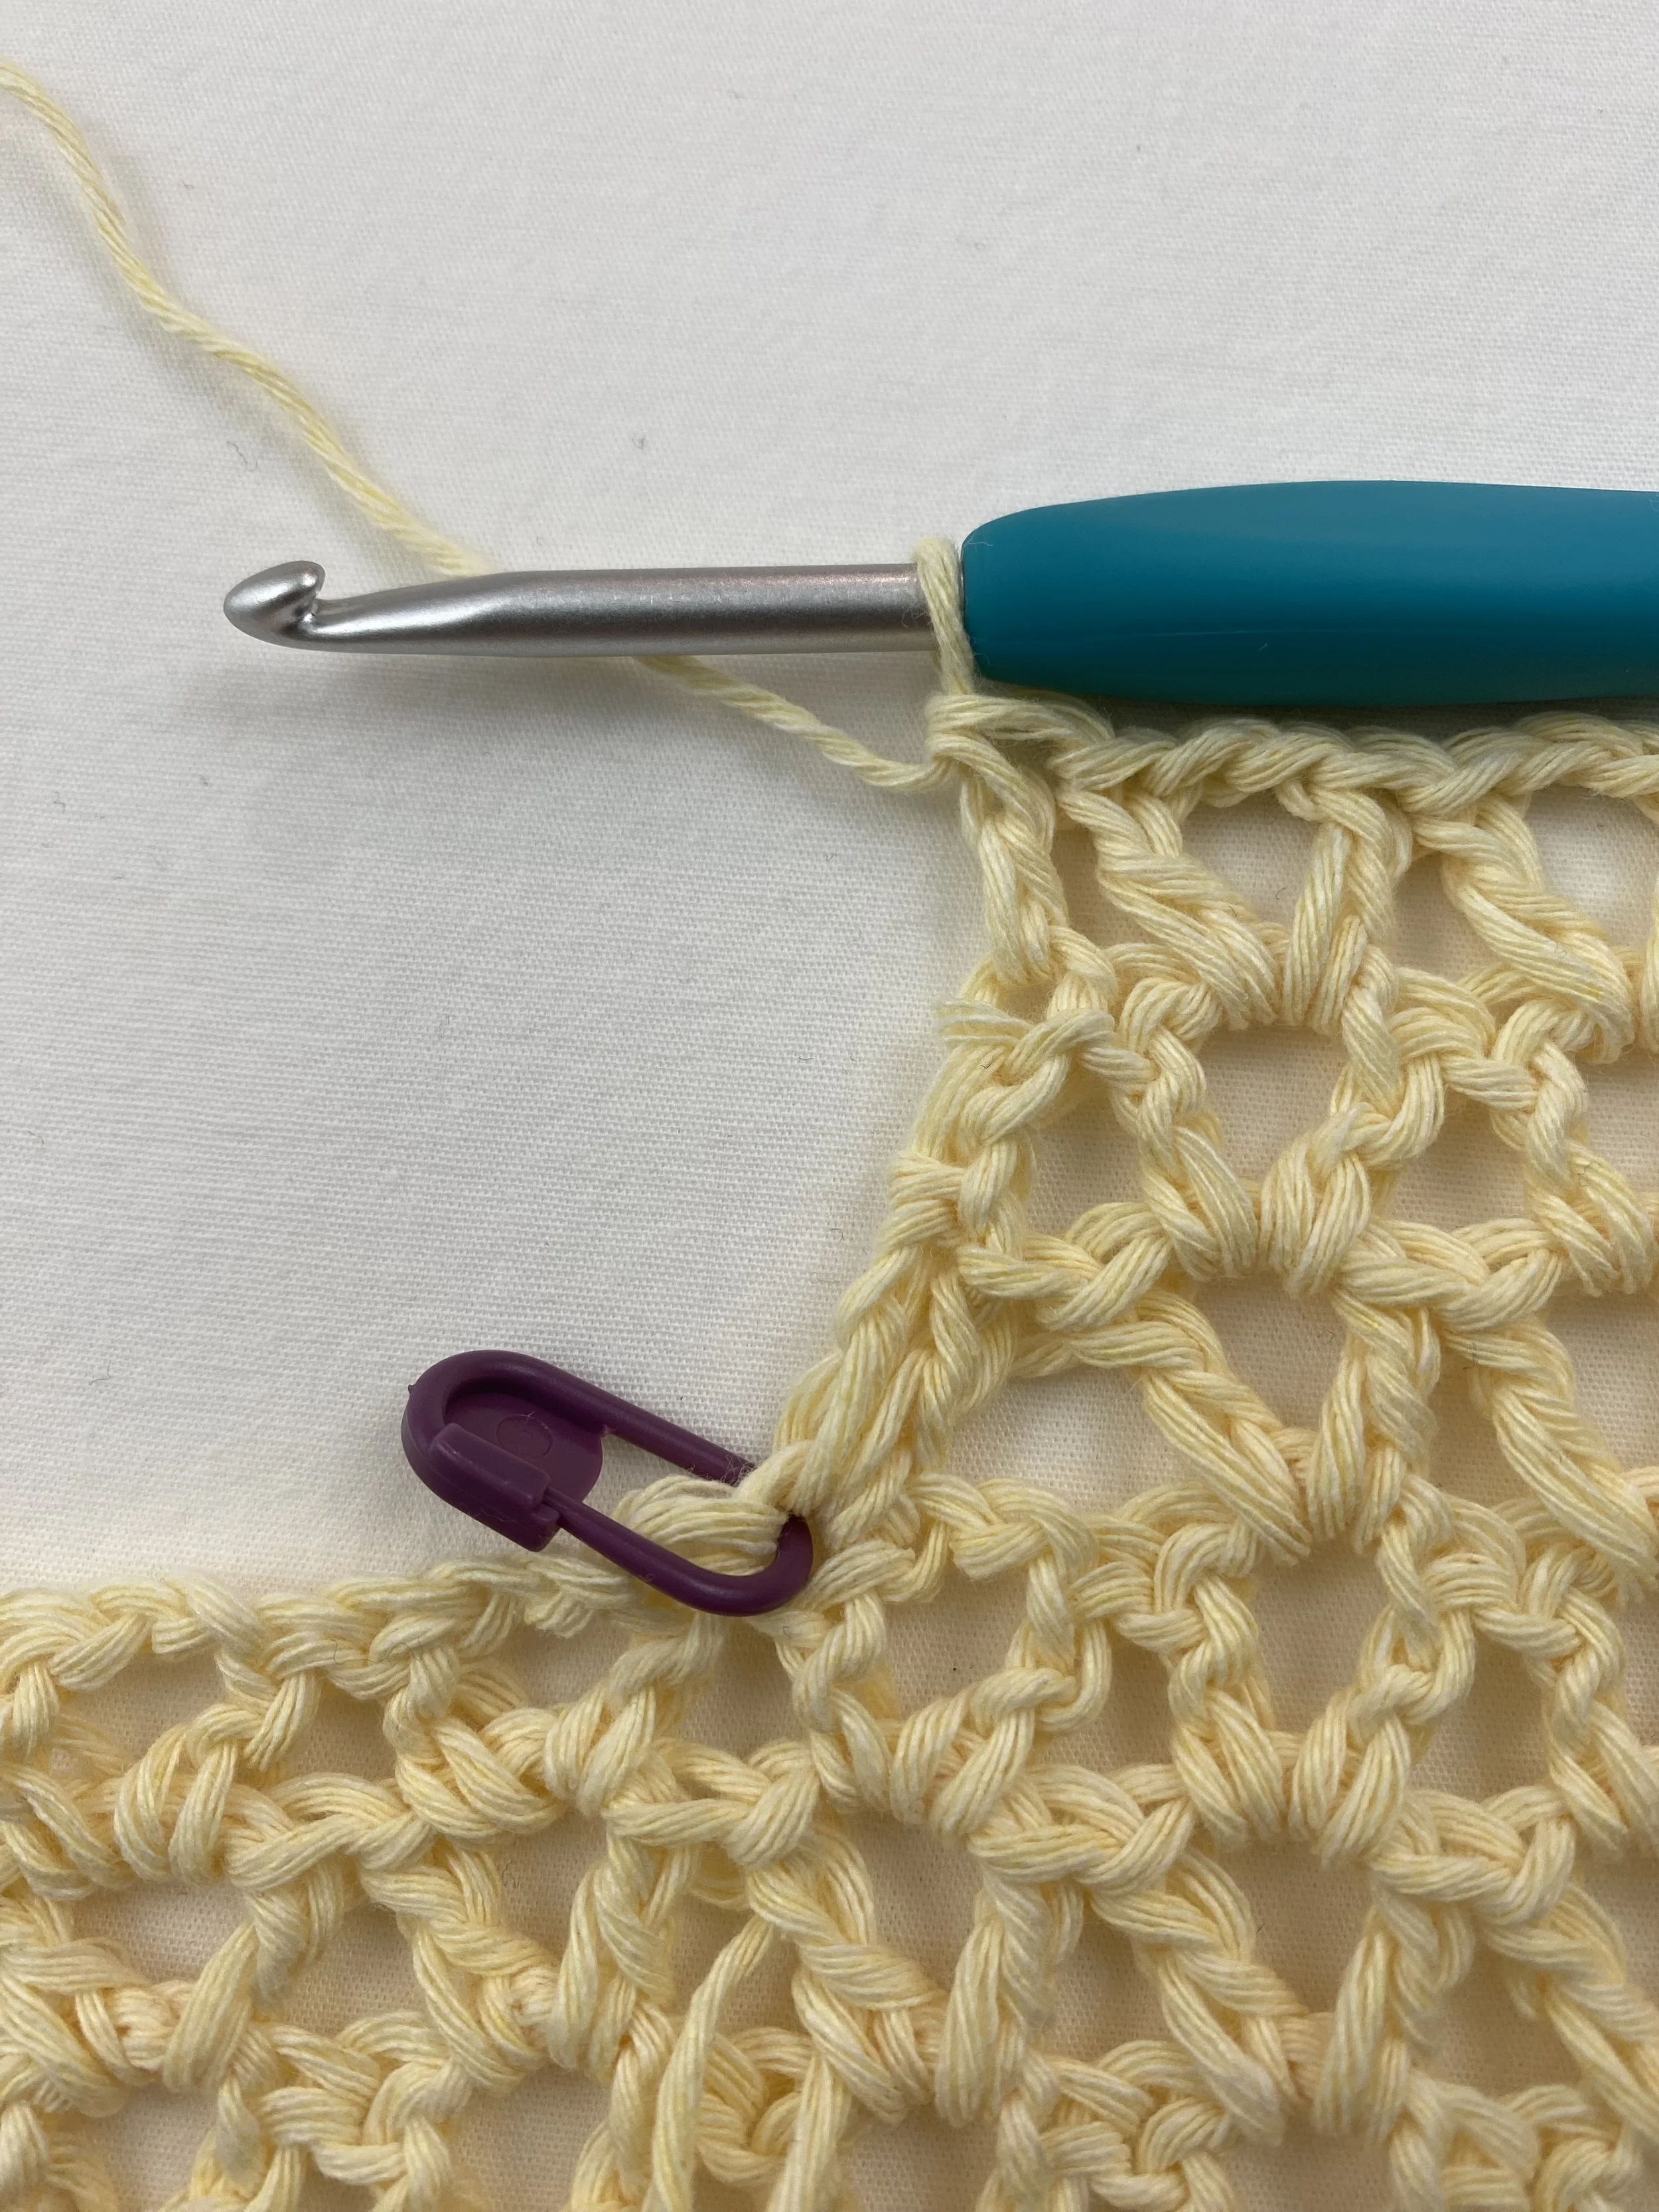
Decrease Row 1: Begin your row as normal and work in pattern to the last ch-2 sp before your stitch marker, sk the last ch-2 sp, work 2 dc in the last dc. Turn.
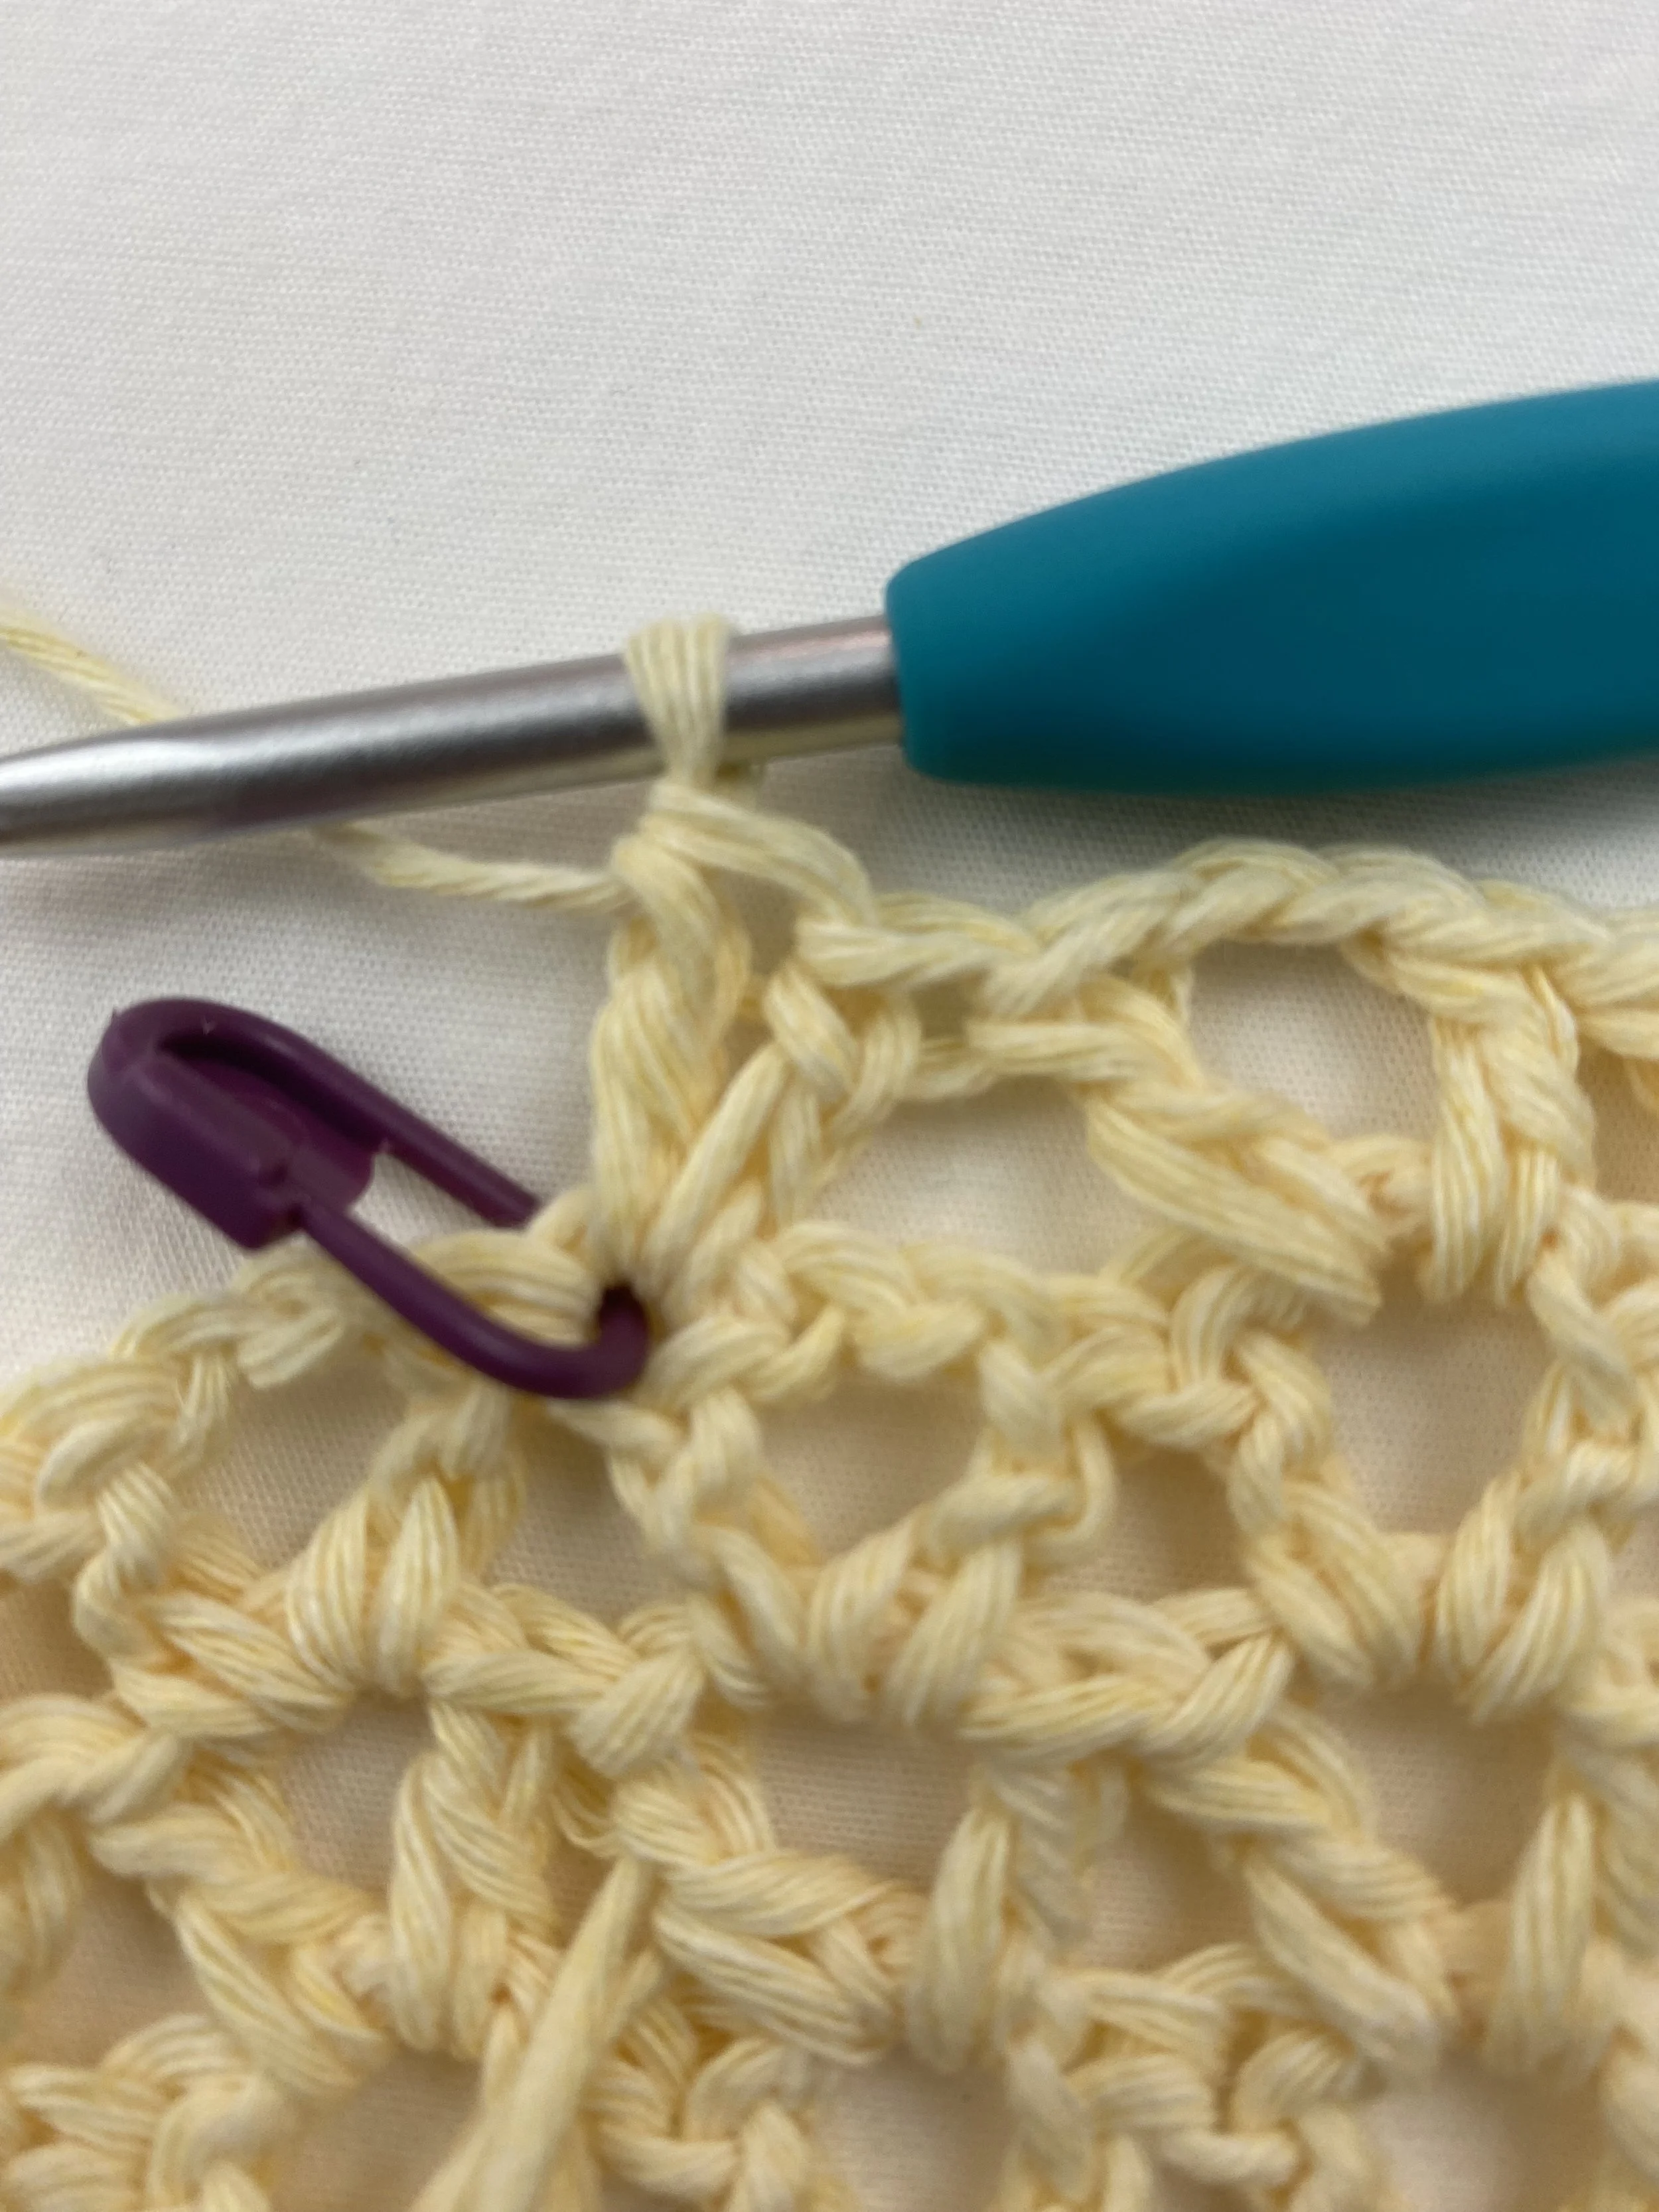
This photo shows the placement of your last two stitches at the end of decrease row 1.
Decrease Row 2: stacked sc in first st, v-st in next ch-2 sp, work in pattern to end of row. Turn.
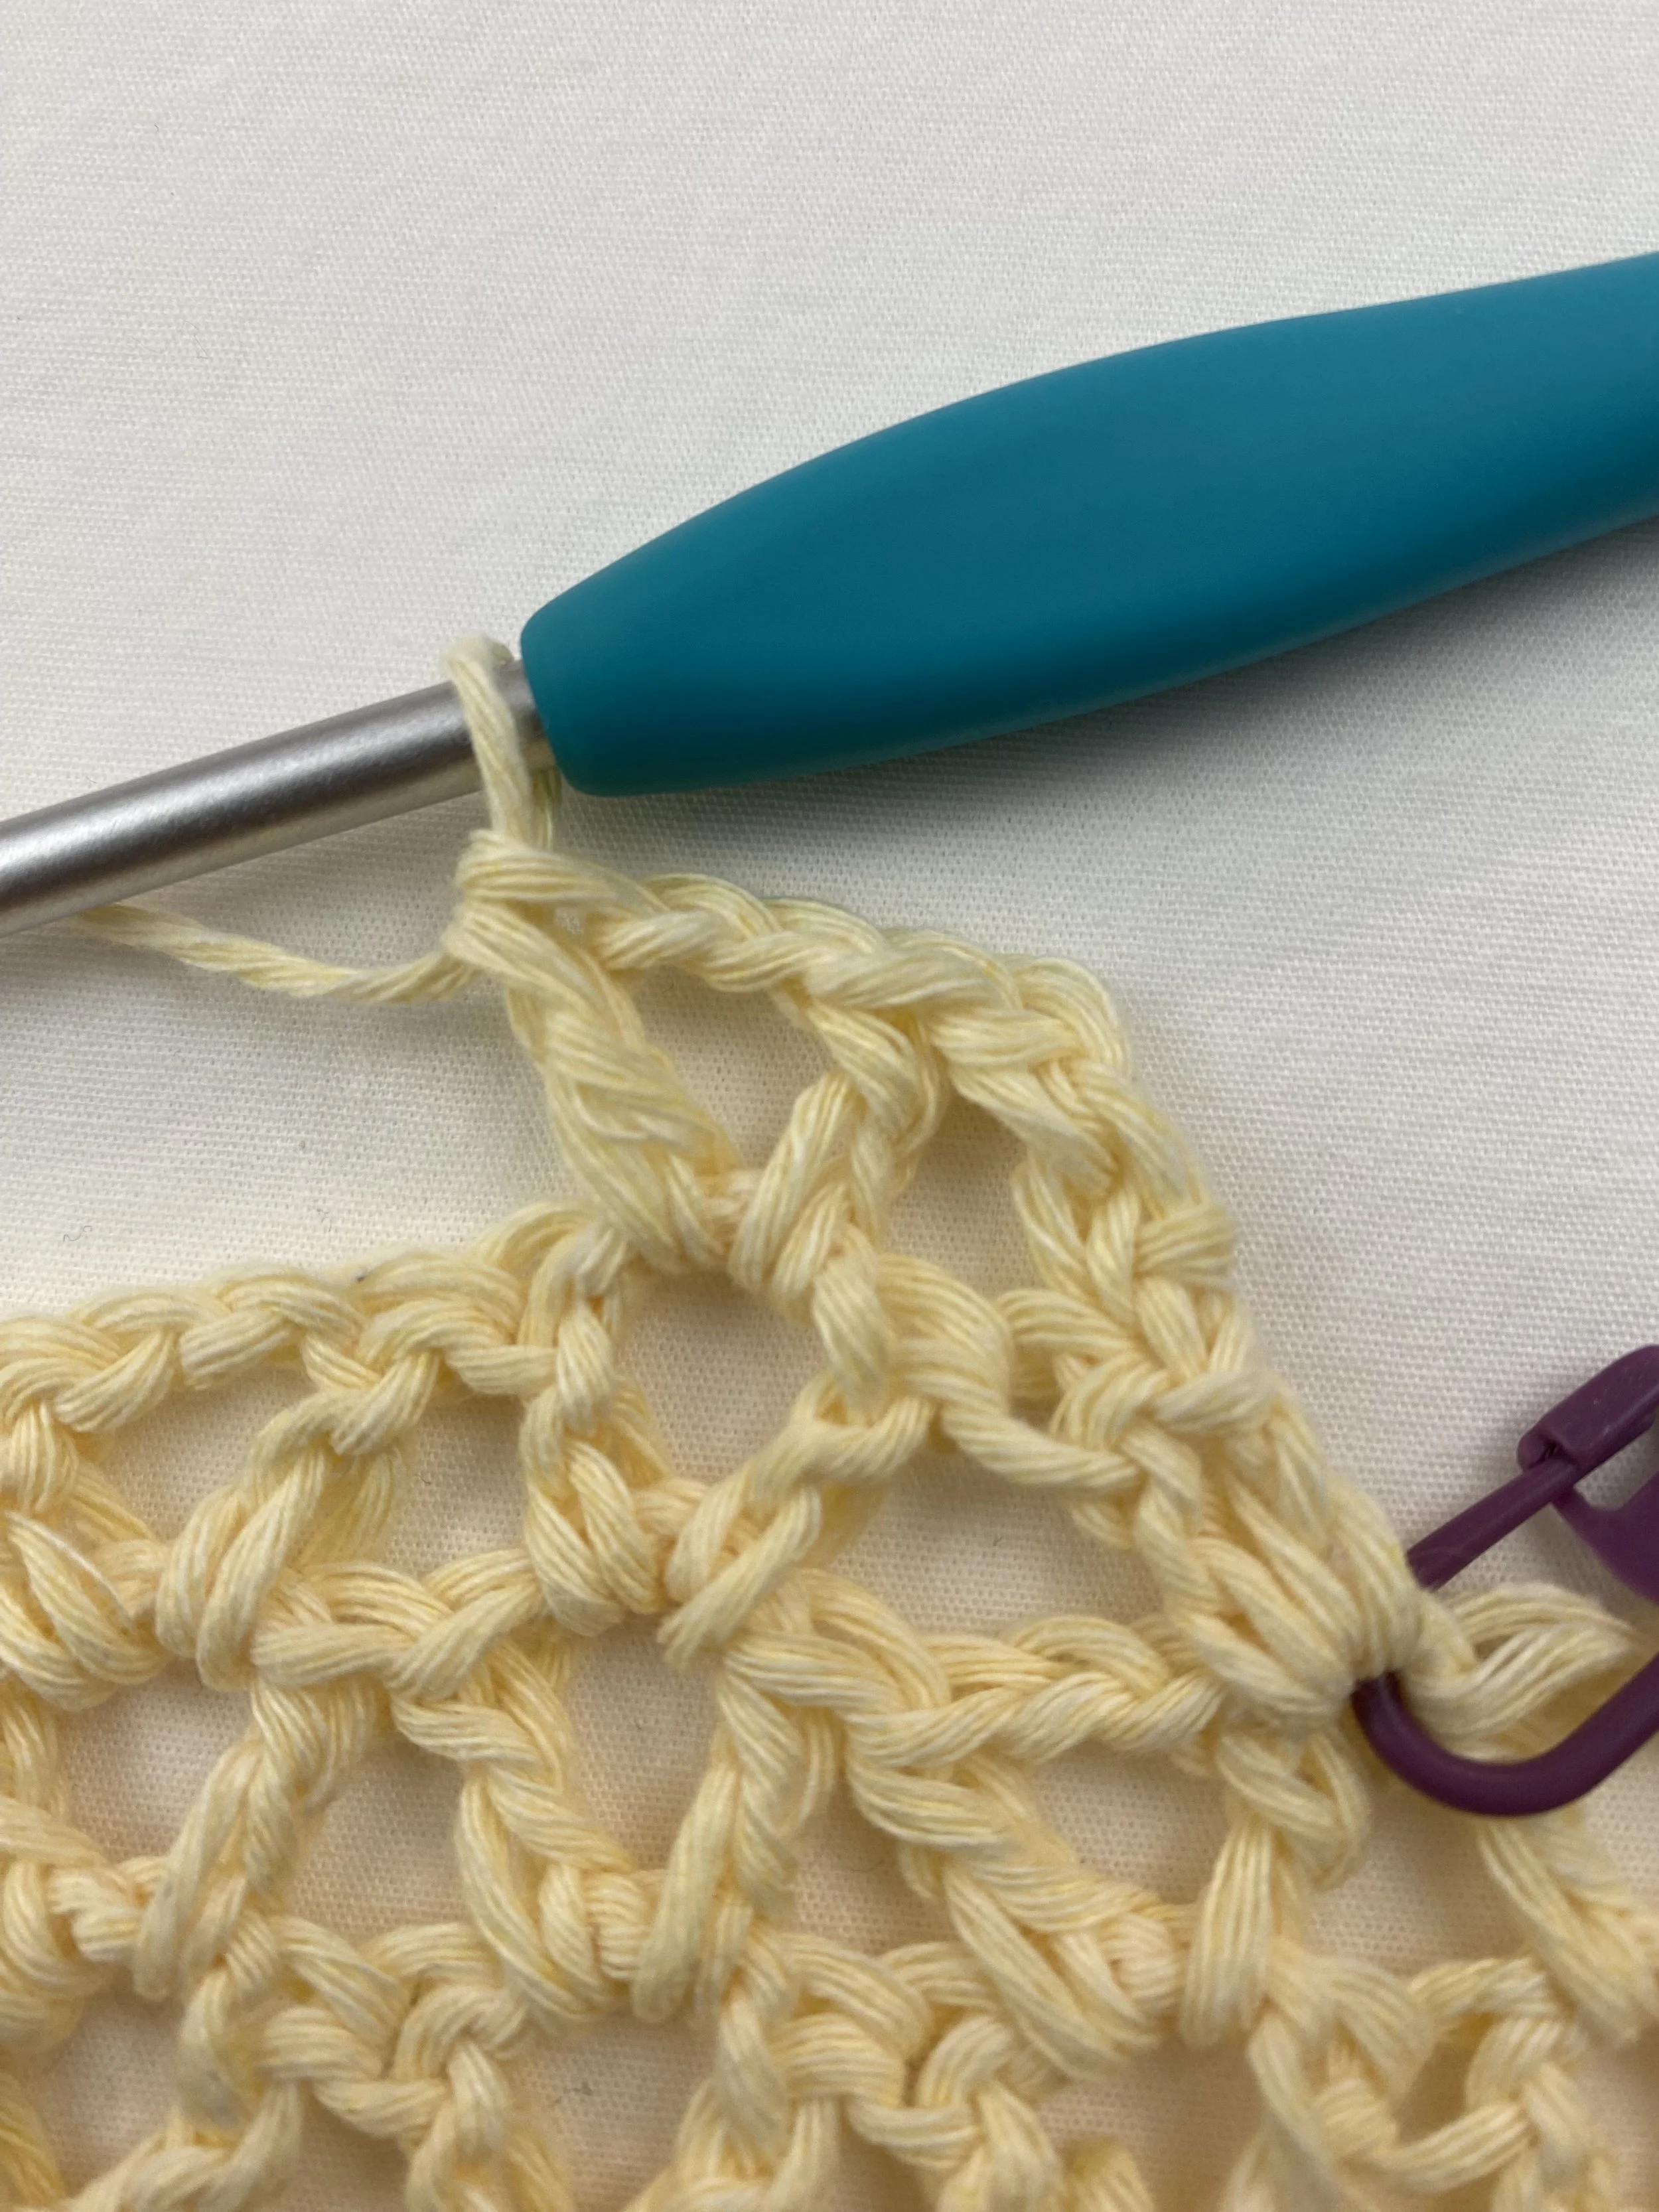
This photo shows the placement of your stitches for decrease row 2.
Decrease Row 3: Work evenly in pattern to end of row. Turn.
Decrease Row 1 - 3 complete.
Repeat Decrease rows 1-3 until you have the same number of rows as your back panel. (all sizes work 16 rows).
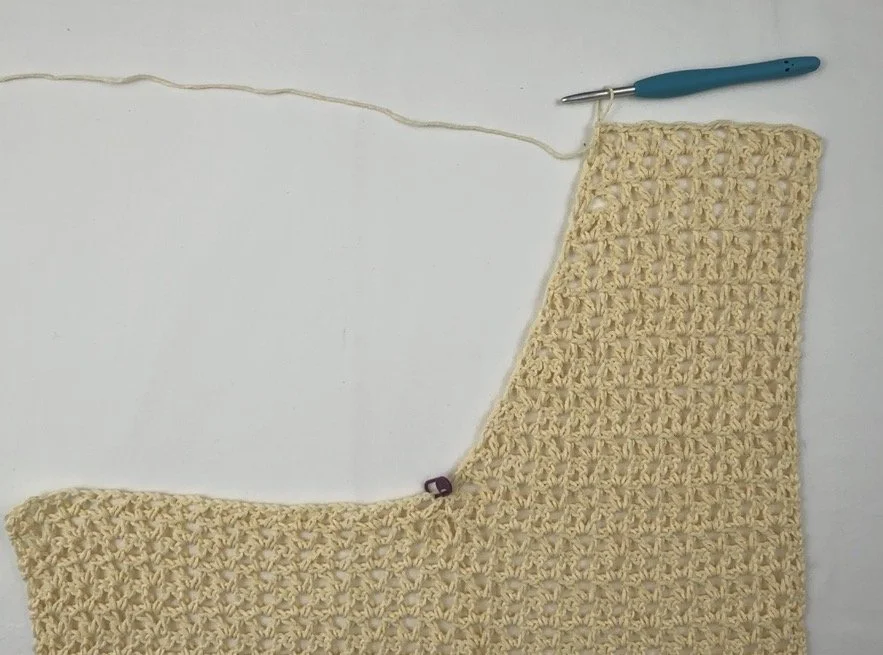
First half of completed neckline shaping.
Fasten off and repeat the steps on the second half of your front panel.
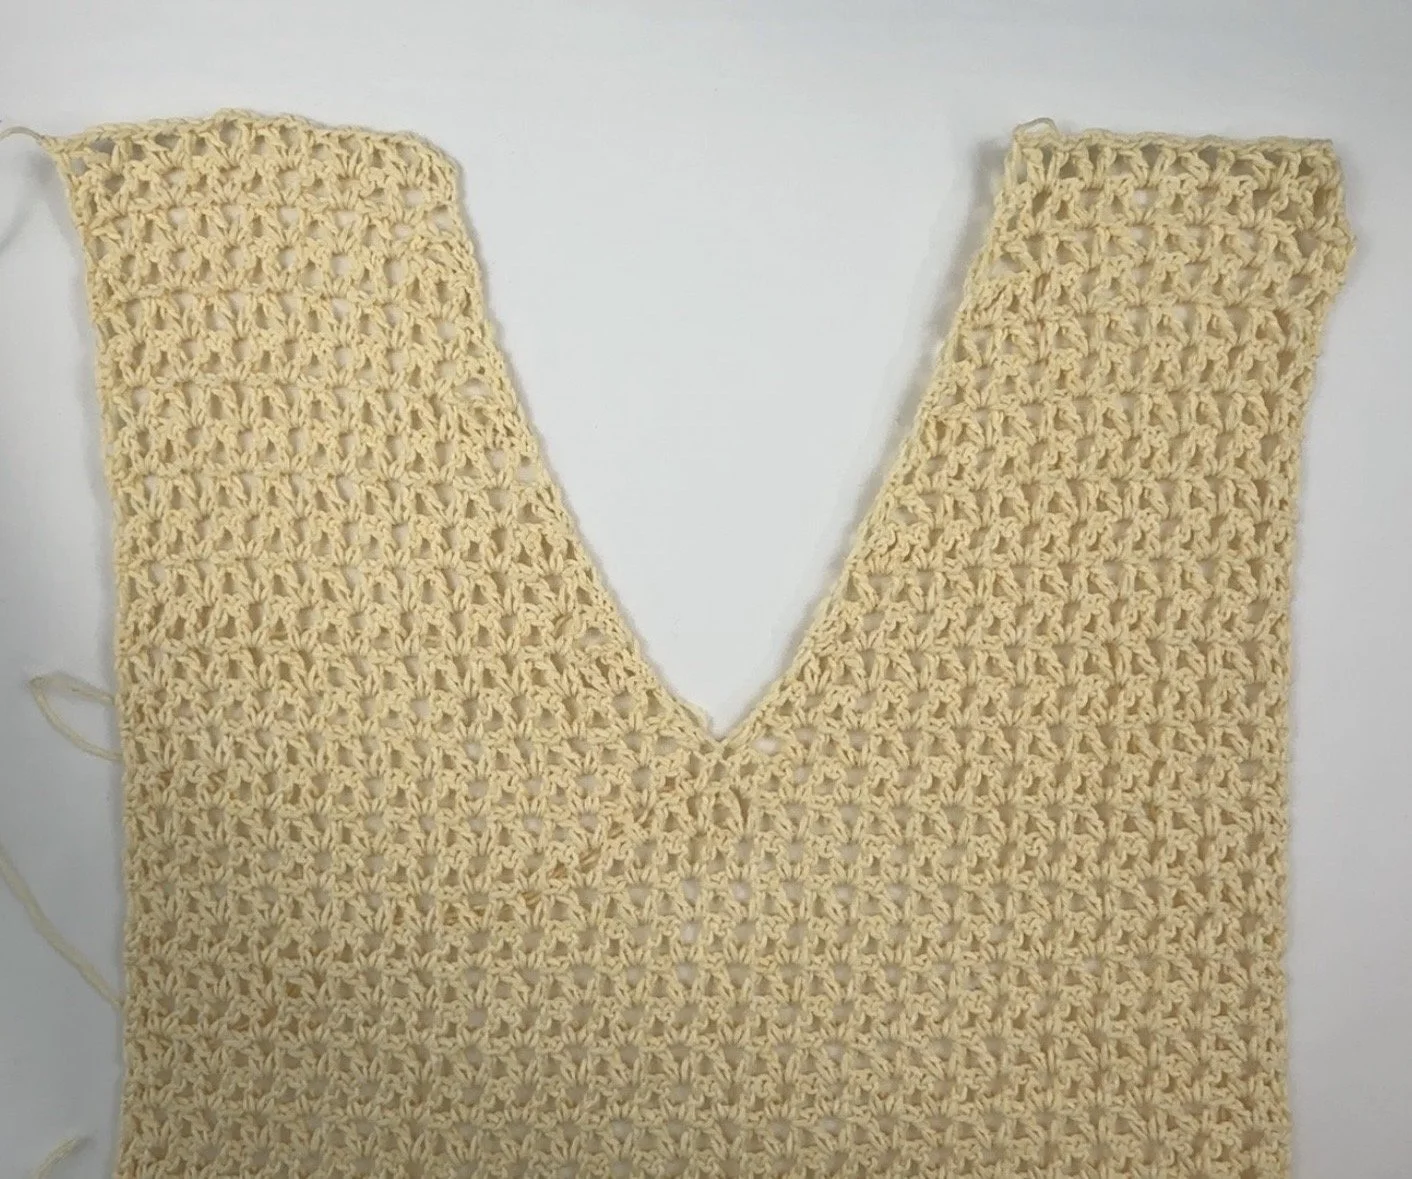
completed front panel.
Sleeve (Make 2)
Foundation Chain: ch or a multiple of 4 until your ch is twice your armhole depth, then add 5 chs.
ch 69(69, 69, 85, 85) (85, 93, 93, 93)
Row 1: v-st in the 6th ch from the hook (5 sk chs count as dc and 2 chs), sk 3 chs, v-st in next ch, rep ** to last 3 chs, sk 2 chs, dc in last ch. Turn.
16 v-sts + 2 dc (16 v-sts + 2 dc, 16 v-sts + 2 dc, 20 v-sts + 2 dc, 20 v-sts + 2 dc) (20 v-sts + 2 dc, 22 v-sts + 2dc, 22 v-sts + 2dc, 22 v-sts + 2dc)
Row 2: Stacked sc in first st (or ch 3), v-st in next ch-2 sp, *v-st in each ch-2 sp to end of row, dc in top of tch. Turn.
Row 3: stacked sc in first st, *v-st in each ch-2 sp to end of row, dc in last st. Turn.
Row 4: Repeat row 3 until sleeve is 2 inches shorter than desired length. (XS - L 36 rows, XL - 4 XL 34 rows, 5 XL 32 rows).
Measure the width of your piece after the first 4-6 rows to ensure the width is what you would like it to be and adjust as needed.
Measure the length of the sleeve before adding your wrist ribbing.
Ribbing set up row: sc in first st, sc2tog across row. (insert hook into next st, yo pull up a loop, insert hook in next st or ch-sp, yo pull up a loop, yo pull through all three loops on hook). Turn.
Ribbing row 1: ch 10 (or until ch is 2 inches long), sc in second ch from the hook, and each ch across the row, sl st to the next 2 sc on sleeve. Turn.
Row 2: sk the 2 sl sts, blo sc in next 9 sts of ribbing, Turn.
Row 3: ch 1, blo sc in next 9 sts, sl st to the next 2 sc on sleeve. Turn.
Repeat row 2 and 3 across the wrist. Fasten off.
Finishing
Step 1: sew your pieces together. Attach your front panel to your back panel, then attach the sleeves then sew the side seams.
Step 2: Evenly work a round of hdc around the neck opening.
Step 3: Evenly work a round of sc around the hemline and then work your ribbing in the same way you did on your sleeves.
Sew the first and last row of your ribbing together and weave in all remaining ends.